OAuth 2.0: Part 3 - Authorization Code Flow
Introduction
In the previous lessons (Part 1 and Part 2), we went through setting up Keycloak, creating a realm, setting up a client, and adding a user. Now in this part, we’re going to learn how to actually authenticate a user using the Authorization Code Flow.
But first, let me clear up something that confuses a lot of people: what’s the difference between Authorization Code Grant Type and Authorization Code Flow?
Remember how I mentioned earlier that OAuth 2.0 handles authorization (what you’re allowed to do), while OpenID Connect sits on top of it to handle authentication (who you are)?
Well, “Authorization Code Grant Type” is the OAuth 2.0 term, and “Authorization Code Flow” is what OpenID Connect calls it. They basically work the same way. The main difference is just in the scope of what they’re doing. This will make more sense once we actually walk through some examples later in this article.
Just to quickly refresh the memory, here’s what we set up in the previous part:
- Client ID:
demo-app- Client Secret:
QxDILK2t5mYmODOgke4vSsVEQeeupjAw- Username:
amrit- Password:
password123
Now let’s dive into how this actually works.
OAuth 2.0 High Level Architecture
Before we get into the details of the Authorization Code Flow, let’s quickly revisit the high-level architecture we discussed in Part 1. This will help you understand where each component fits in the flow.
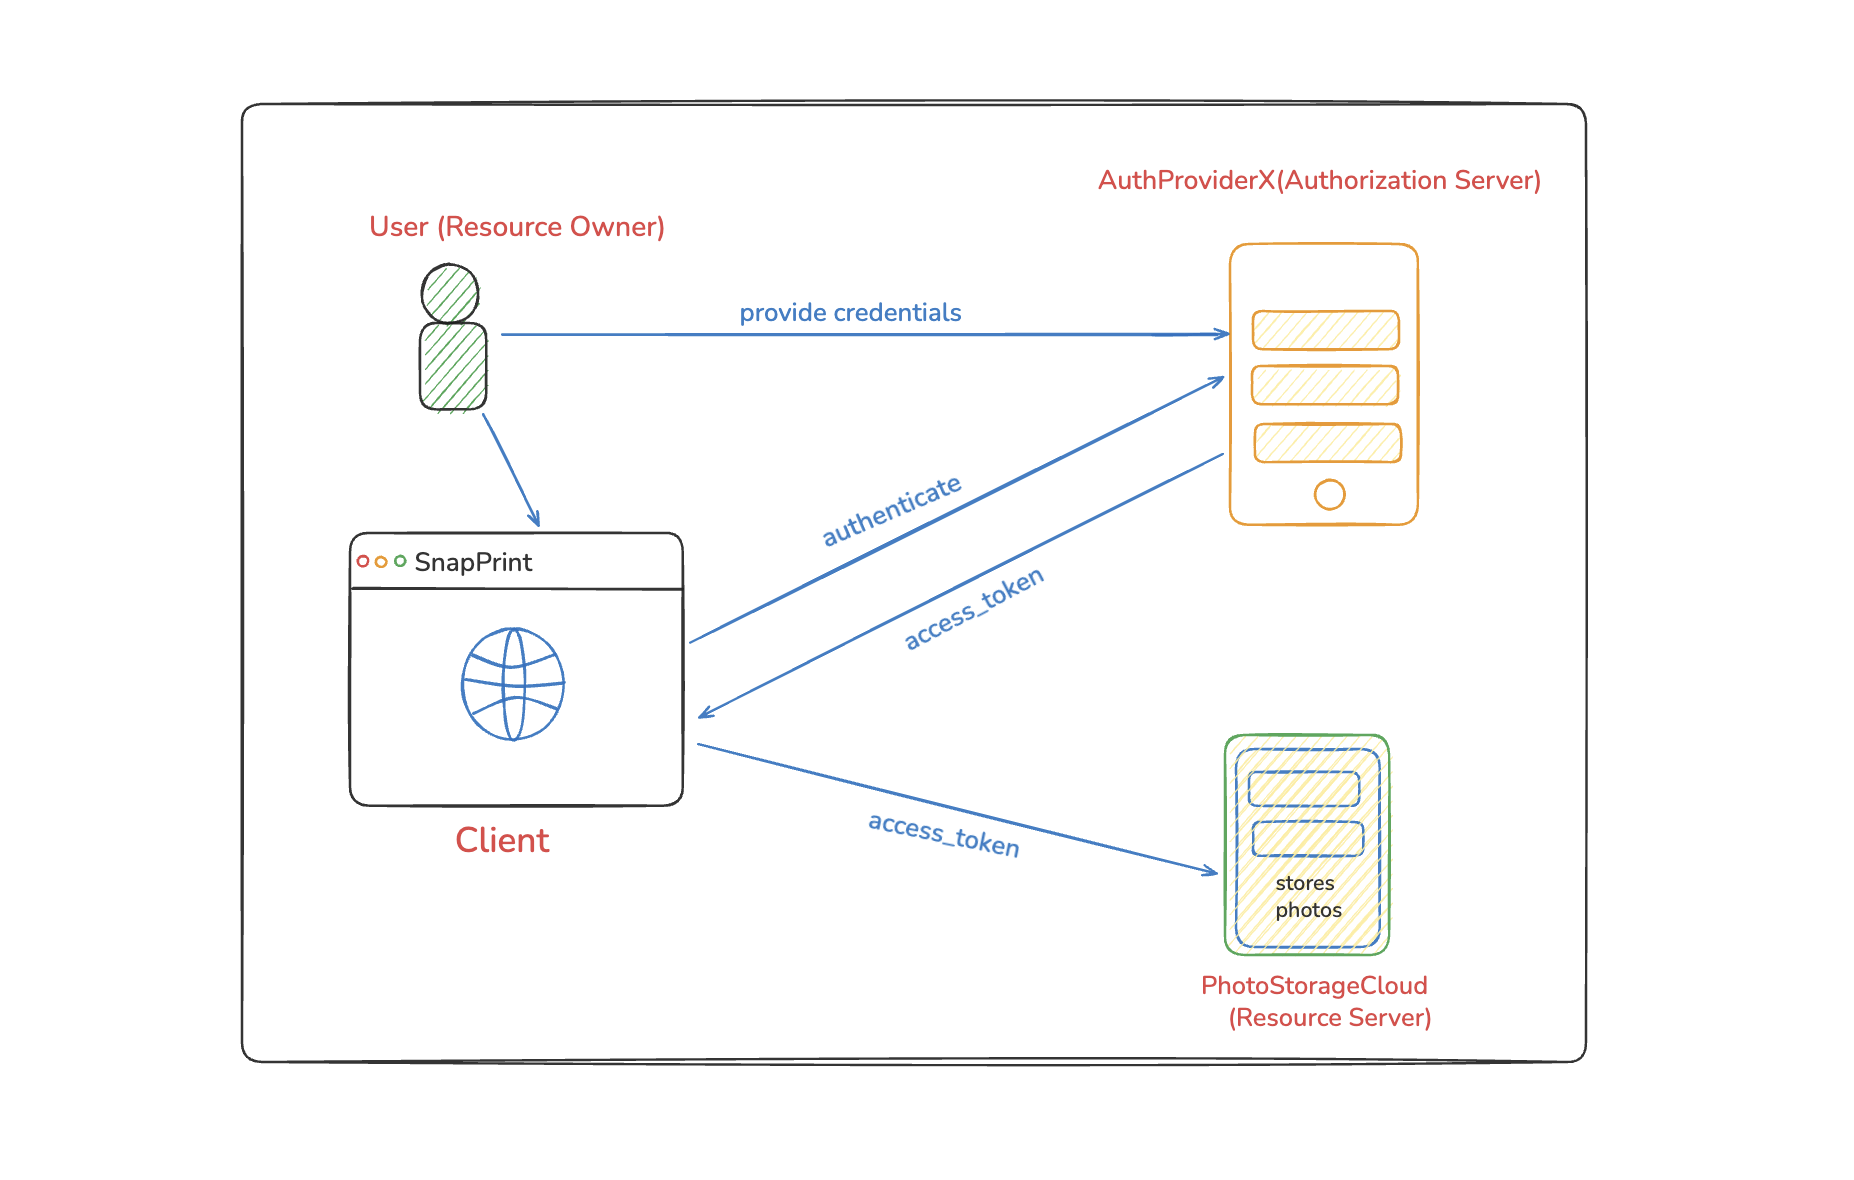
As a reminder, the key players are:
- Resource Owner: The end user (in our case,
amrit) - Client: Your application (
demo-app) (which is not yet created) - Authorization Server: Keycloak (running on port
9090) - Resource Server: The API you want to access (
messages-service) (which is not yet created)
As mentioned earlier, There are several ways such as Authorization Code Flow, Client Credentials Flow, Implicit Flow, Resource Owner Password Flow to get access_token.
In this part, we are going to focus on acquiring access_token using Authorization Code Flow.
Before we jump in, let’s first grab some important URLs that we’re going to need later.
Log into the Keycloak Admin Console, switch to your demo-realm realm, and go to Realm settings. You’ll see a section called Endpoint with a link that says "OpenID Endpoint Configuration."
Click on that link (OR GET http://localhost:9090/realms/demo-realm/.well-known/openid-configuration), and you’ll get a JSON response that looks like the following:
For the shake of space, I am going to use HOST == http://localhost:9090
{
  "issuer": "HOST/realms/demo-realm",
  "authorization_endpoint": "HOST/realms/demo-realm/protocol/openid-connect/auth",
  "token_endpoint": "HOST/realms/demo-realm/protocol/openid-connect/token",
  "introspection_endpoint": "HOST/realms/demo-realm/protocol/openid-connect/token/introspect",
  "userinfo_endpoint": "HOST/realms/demo-realm/protocol/openid-connect/userinfo",
  "end_session_endpoint": "HOST/realms/demo-realm/protocol/openid-connect/logout",
  "frontchannel_logout_session_supported": true,
  "frontchannel_logout_supported": true,
  "jwks_uri": "HOST/realms/demo-realm/protocol/openid-connect/certs",
  "check_session_iframe": "HOST/realms/demo-realm/protocol/openid-connect/login-status-iframe.html",
  "grant_types_supported": [
    "authorization_code",
    "client_credentials",
    "implicit",
    "password",
    "refresh_token",
    "urn:ietf:params:oauth:grant-type:device_code",
    "urn:ietf:params:oauth:grant-type:token-exchange",
    "urn:ietf:params:oauth:grant-type:uma-ticket",
    "urn:openid:params:grant-type:ciba"
  ],
  ...
  "response_types_supported": [
    "code",
    "none",
    "id_token",
    "token",
    "id_token token",
    "code id_token",
    "code token",
    "code id_token token"
  ],
  ...
  ...
}
We will use authorization_endpoint, token_endpoint during the Authorization Code Flow.
Authentication using Authorization Code Flow
In Authorization Code Flow, first we get an authorization_code via Redirect URL on front-channel (browser url) and then use that authorization_code along with client_id and client_secret to get access_token via the back-channel (code on server).
Let’s walk through each step with actual examples using our Keycloak setup.
Step 1: Get Authorization code
First, we are going to request for authorization_code using the authorization_endpoint as follows:
- You can paste this URL directly in your browser to see the Keycloak login page!
http://localhost:9090/realms/demo-realm/protocol/openid-connect/auth?
  response_type=code&
  client_id=demo-app&
  scope=openid&
  state=randomstring&
  redirect_uri=http://localhost:8080/callback
The
redirect_uriyou specified in the request URL should match one of the Client’s Valid redirect URIs configured in the Login settings.
Step 2: User Authenticates
When the user visits that URL, they’ll see Keycloak’s login page. They enter their credentials:
- Username:
amrit - Password:
password123
Keycloak verifies these credentials. If they’re correct, it moves to the next step.
Step 3: Keycloak Redirects with Authorization Code
After successful authentication, Keycloak redirects the user back to your application with an authorization code:
http://localhost:8080/callback?state=randomstring&
  session_state=ZXSs2J98g4ff7GJOFK3DBOAo&
  iss=http%3A%2F%2Flocalhost%3A8080%2Frealms%2Fdemo-realm&
  code=<YOUR.AUTHORIZATION.CODE>
The authorization code is something like: 62b284d7-0b67-f946-5f8d-3eb18bf47566.ZXSs2J98g4ff7GJOFK3DBOAo.a8274b41-73bf-40da-8f19-f337a965070d
This code is temporary and can only be used once. It’s like a voucher that your application can exchange for the real access token.
Step 4: Exchange Authorization Code for Access Token
Now that we have authorization_code, we can get access_token using token_endpoint as follows:
curl --location 'http://localhost:9090/realms/demo-realm/protocol/openid-connect/token' \
--header 'Content-Type: application/x-www-form-urlencoded' \
--data-urlencode 'grant_type=authorization_code' \
--data-urlencode 'client_id=demo-app' \
--data-urlencode 'client_secret=QxDILK2t5mYmODOgke4vSsVEQeeupjAw' \
--data-urlencode 'code=941c489a-9ef9-8c4d-db33-a2069f45da15.p1LYxyFRhKeLmWXD0YIqZZtt.a8274b41-73bf-40da-8f19-f337a965070d' \
--data-urlencode 'redirect_uri=http://localhost:8080/callback'
Step 5: Receive Tokens
If everything is correct, Keycloak responds with:
{
"access_token":"eyJhbGciOiJSUzI1NiIsI.eyJleHAiOjXSwicmVhbG1fYWNjZXNzIjpbmFtZSI6IkFtcmBsZS5jb20ifQ.IYTYdGlO23FeA6FB5jemmuKYpcdRhSikcaa5olmy49_xQGX6PKVOS4ABbQ-_HlYcikDS9m-U-yVCTXxQExpjnwjd1VJrXj0YNrpM9lb7mCp6T24pP-9FbICqa6a802n1JHU2pvrVy7m-IelQ5NnDzDKLPFg",
"expires_in":300,
"refresh_expires_in":1800,
"refresh_token":"eyJhbGciIwNi1iMmRiMGU0MGE0ZjMifQ.IYTYdGlO23FeA6FB5jemmuKYpcdRhSikcaa5olmy49_xQGX6.eyJleHAiOjE3NjkzMDcwMjkZW1vLWFwcCIsInNg",
"not-before-policy":1769305142,
"session_state":"p1LYxyFRhKeLmWXD0YIqZZtt",
"scope":"openid profile email"
}
Now your application has:
- access_token: Use this to access protected resources
- refresh_token: Use this to get a new access token when it expires
Note: The authorization code is valid only for a short period of time. So, once you get the authorization code, you should quickly invoke the token endpoint. Otherwise, you will get a response like this:
{
  "error": "invalid_grant",
  "error_description": "Code not valid"
}
Finally, we got the access token which we can use while accessing a protected resource on a Resource Server.
Understanding the Tokens
Let’s look at what each token does:
Access Token
This is a JWT (JSON Web Token) that proves your application has permission to access resources. You include it in API requests like this:
curl -H "Authorization: Bearer YOUR_ACCESS_TOKEN" \
  http://your-api.com/protected-resource
You can take your access token and paste it in jwt.io website to see the payload attached to this token. Here’s an example payload:
{
  "exp": 1769305525,
  "iat": 1769305225,
  "auth_time": 1769305165,
  "jti": "onrtac:67241866-315d-ae2e-43c4-6f6758b38aac",
  "iss": "http://localhost:9090/realms/demo-realm",
  "aud": "account",
  "sub": "ab5ce8c0-3d4c-40e6-8a1e-9a5d014f7298",
  "typ": "Bearer",
  "azp": "demo-app",
  "sid": "p1LYxyFRhKeLmWXD0YIqZZtt",
  "acr": "1",
  "allowed-origins": ["http://localhost:8080"],
  "realm_access": {
    "roles": ["offline_access", "default-roles-demo-realm", "uma_authorization"]
  },
  "resource_access": {
    "account": {
      "roles": ["manage-account", "manage-account-links", "view-profile"]
    }
  },
  "scope": "openid profile email",
  "email_verified": true,
  "name": "Amrit Adhikari",
  "preferred_username": "amrit",
  "given_name": "Amrit",
  "family_name": "Adhikari",
  "email": "amrit@example.com"
}
Refresh Token
Access tokens expire quickly (usually 5-15 minutes). When that happens, use the refresh token to get a new access token without making the user log in again:
curl -X POST 'http://localhost:9090/realms/demo-realm/protocol/openid-connect/token' \
  -H 'Content-Type: application/x-www-form-urlencoded' \
  -d 'grant_type=refresh_token' \
  -d 'client_id=demo-app' \
  -d 'client_secret=YOUR_CLIENT_SECRET' \
  -d 'refresh_token=YOUR_REFRESH_TOKEN'
ID Token
This is an OpenID Connect token that contains information about the authenticated user. You can decode it (it’s a JWT) to see user details like:
- Username
- Name
- When they authenticated
If you have noticed, in the previous request we specified only "openid" as scope, and we got access_token and refresh_token in the response. This is OAuth 2.0 Authorization Code Grant Type.
Now, if you specify "openid profile" as scope, then you will also get id_token, which contains more information regarding the authenticated user (the Resource Owner), in the response. This is OpenID Connect based Authorization Code Flow.
Why is This Flow Secure?
The Authorization Code Flow is considered very secure because:
- User credentials never touch your app: The user logs in directly on Keycloak’s page
- Authorization code is temporary: It expires in seconds and can only be used once
- Client secret is required: Only your server (which has the secret) can exchange the code
- Access token stays on the server: It’s never exposed to the browser
- HTTPS in production: All this happens over encrypted connections
What’s Next?
In the next part, we will explore how OAuth 2.0 Client Credentials Flow works.
Key Takeaways
- Authorization Code Flow is the most secure OAuth 2.0 flow for web apps
- The flow involves getting a temporary code, then exchanging it for tokens
- Your application never sees the user’s password
- Access tokens are short-lived; refresh tokens let you get new ones
- The authorization code expires quickly and can only be used once
Ready to explore OAuth 2.0 Client Credentials Flow? See you in Part 4!
 Series: OAuth 2.0
Comments
Join the discussion and share your thoughts